Scenery rangoli latest design 2024

Capturing Nature’s Palette: A Simple Guide to Drawing Scenery Rangoli with Coconut Trees, Sea, and Sunset
Rangoli, a traditional art form in India, has the power to transform spaces into vibrant canvases, reflecting the beauty of nature. In this easy guide, we explore how to create a stunning scenery rangoli featuring coconut trees, a tranquil sea, and a mesmerizing sunset. Let’s embark on a creative journey that captures the essence of nature’s palette.
Materials Needed:
- Colored rangoli powders or chalk
- A flat surface (floor or ground)
- A basic outline or reference image (optional)
- Patience and creativity
Step 1: Selecting the Space
Choose a flat surface for your rangoli – it could be your doorstep, courtyard, or any open area. Ensure the surface is clean and dry, providing a perfect canvas for your artwork.
Step 2: Drawing the Horizon
Start by drawing a straight line with a contrasting color to represent the horizon. This will serve as the foundation for your scenic rangoli.
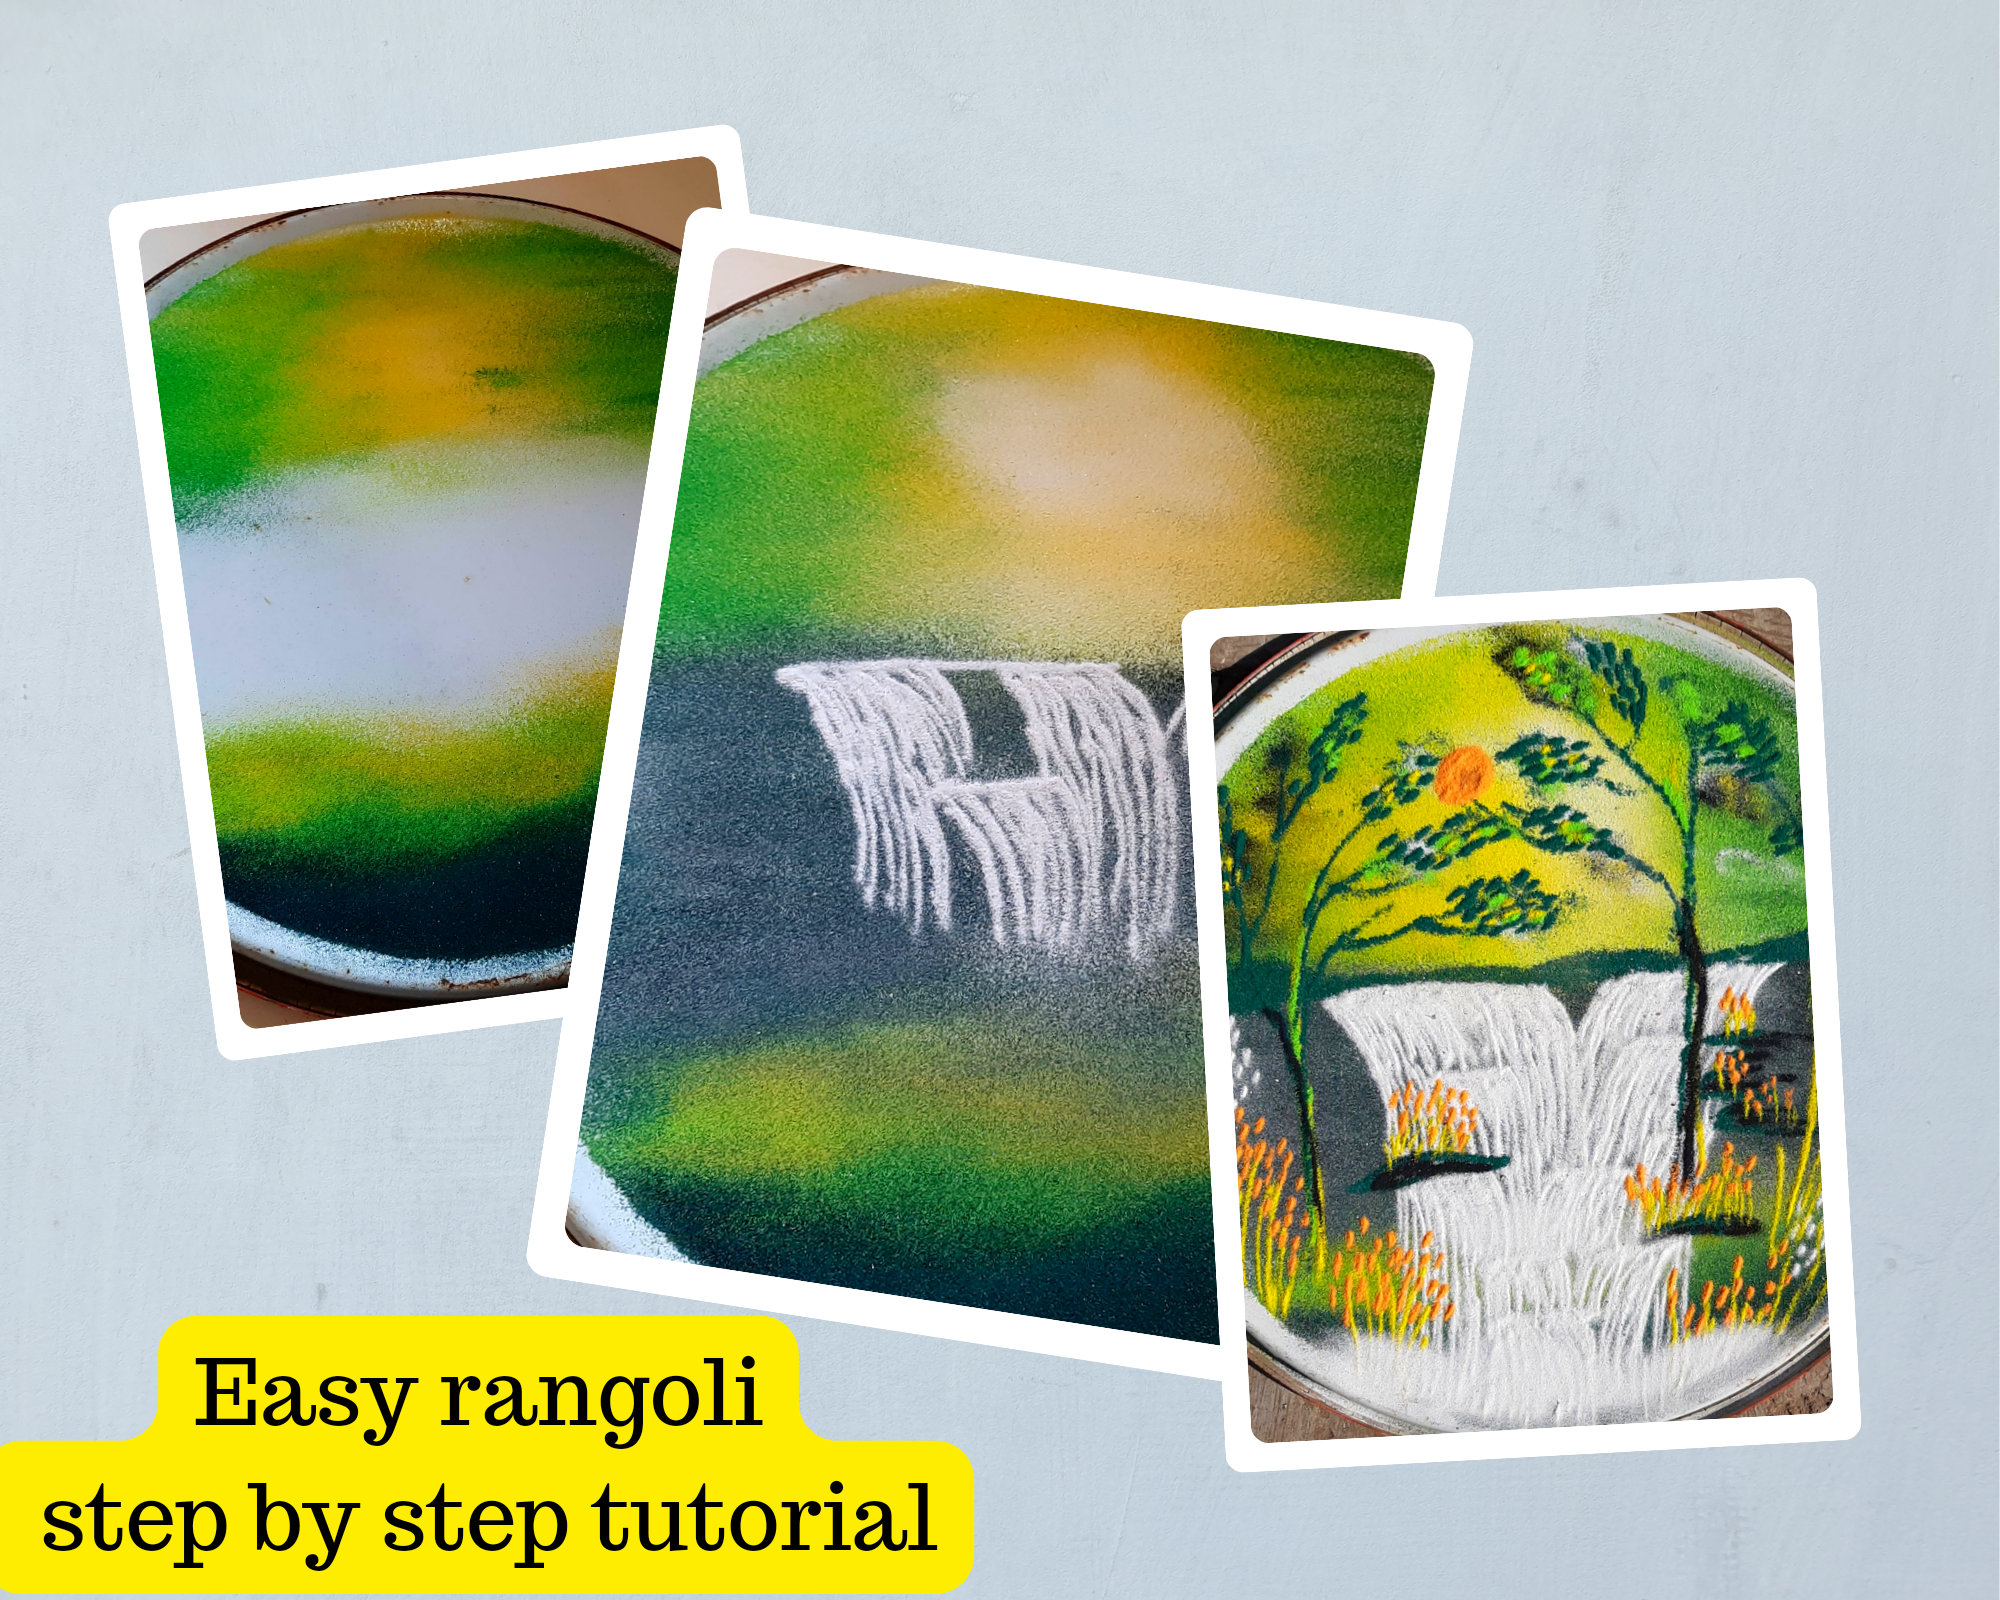
Step 3: Sketching Coconut Trees
Draw a few tall, slender triangles in a row to depict the iconic coconut trees. Begin with the trunk at the bottom, extending upward to form the leaves. Feel free to experiment with the number and arrangement of coconut trees based on your available space.
Step 4: Creating the Sea
Below the horizon line, use a different shade of blue to represent the sea. You can add gentle waves by drawing curved lines. The sea serves as a serene backdrop to your coconut trees.
Step 5: Painting the Sunset
Now, let’s bring the sky to life with a captivating sunset. Use warm colors like orange, pink, and yellow to paint the sky above the horizon. Gradually blend these colors to simulate the transition from day to night.
Step 6: Adding Details
Enhance your rangoli by adding finer details. You can draw birds in the sky, reflections in the water, or even small boats on the sea. These details contribute to the overall charm of your scenic creation.
Step 7: Outlining
For a polished look, outline the major elements of your rangoli using a contrasting color. This step helps define the boundaries and adds a touch of sophistication to your artwork.
Step 8: Filling with Colors
Carefully fill in the coconut trees, sea, and sunset with vibrant colors, ensuring a harmonious blend that brings your rangoli to life.
Step 9: Final Touches
Take a step back to admire your masterpiece. Make any necessary touch-ups and add any final details to enhance the overall aesthetic.
Step 10: Preservation
If you wish to preserve your rangoli, consider spraying it with a fixative or applying a thin layer of transparent glue. This helps protect your artwork from wind or accidental smudging.
Creating a scenery rangoli with coconut trees, sea, and sunset is a delightful way to celebrate nature’s beauty. Whether you’re a seasoned artist or a beginner, let your creativity flow, and enjoy the process of bringing this picturesque scene to life right at your doorstep.
Related Post
Landscape rangoli
In this article you will learn how to draw landscape rangoli in easy steps. Drawing [...]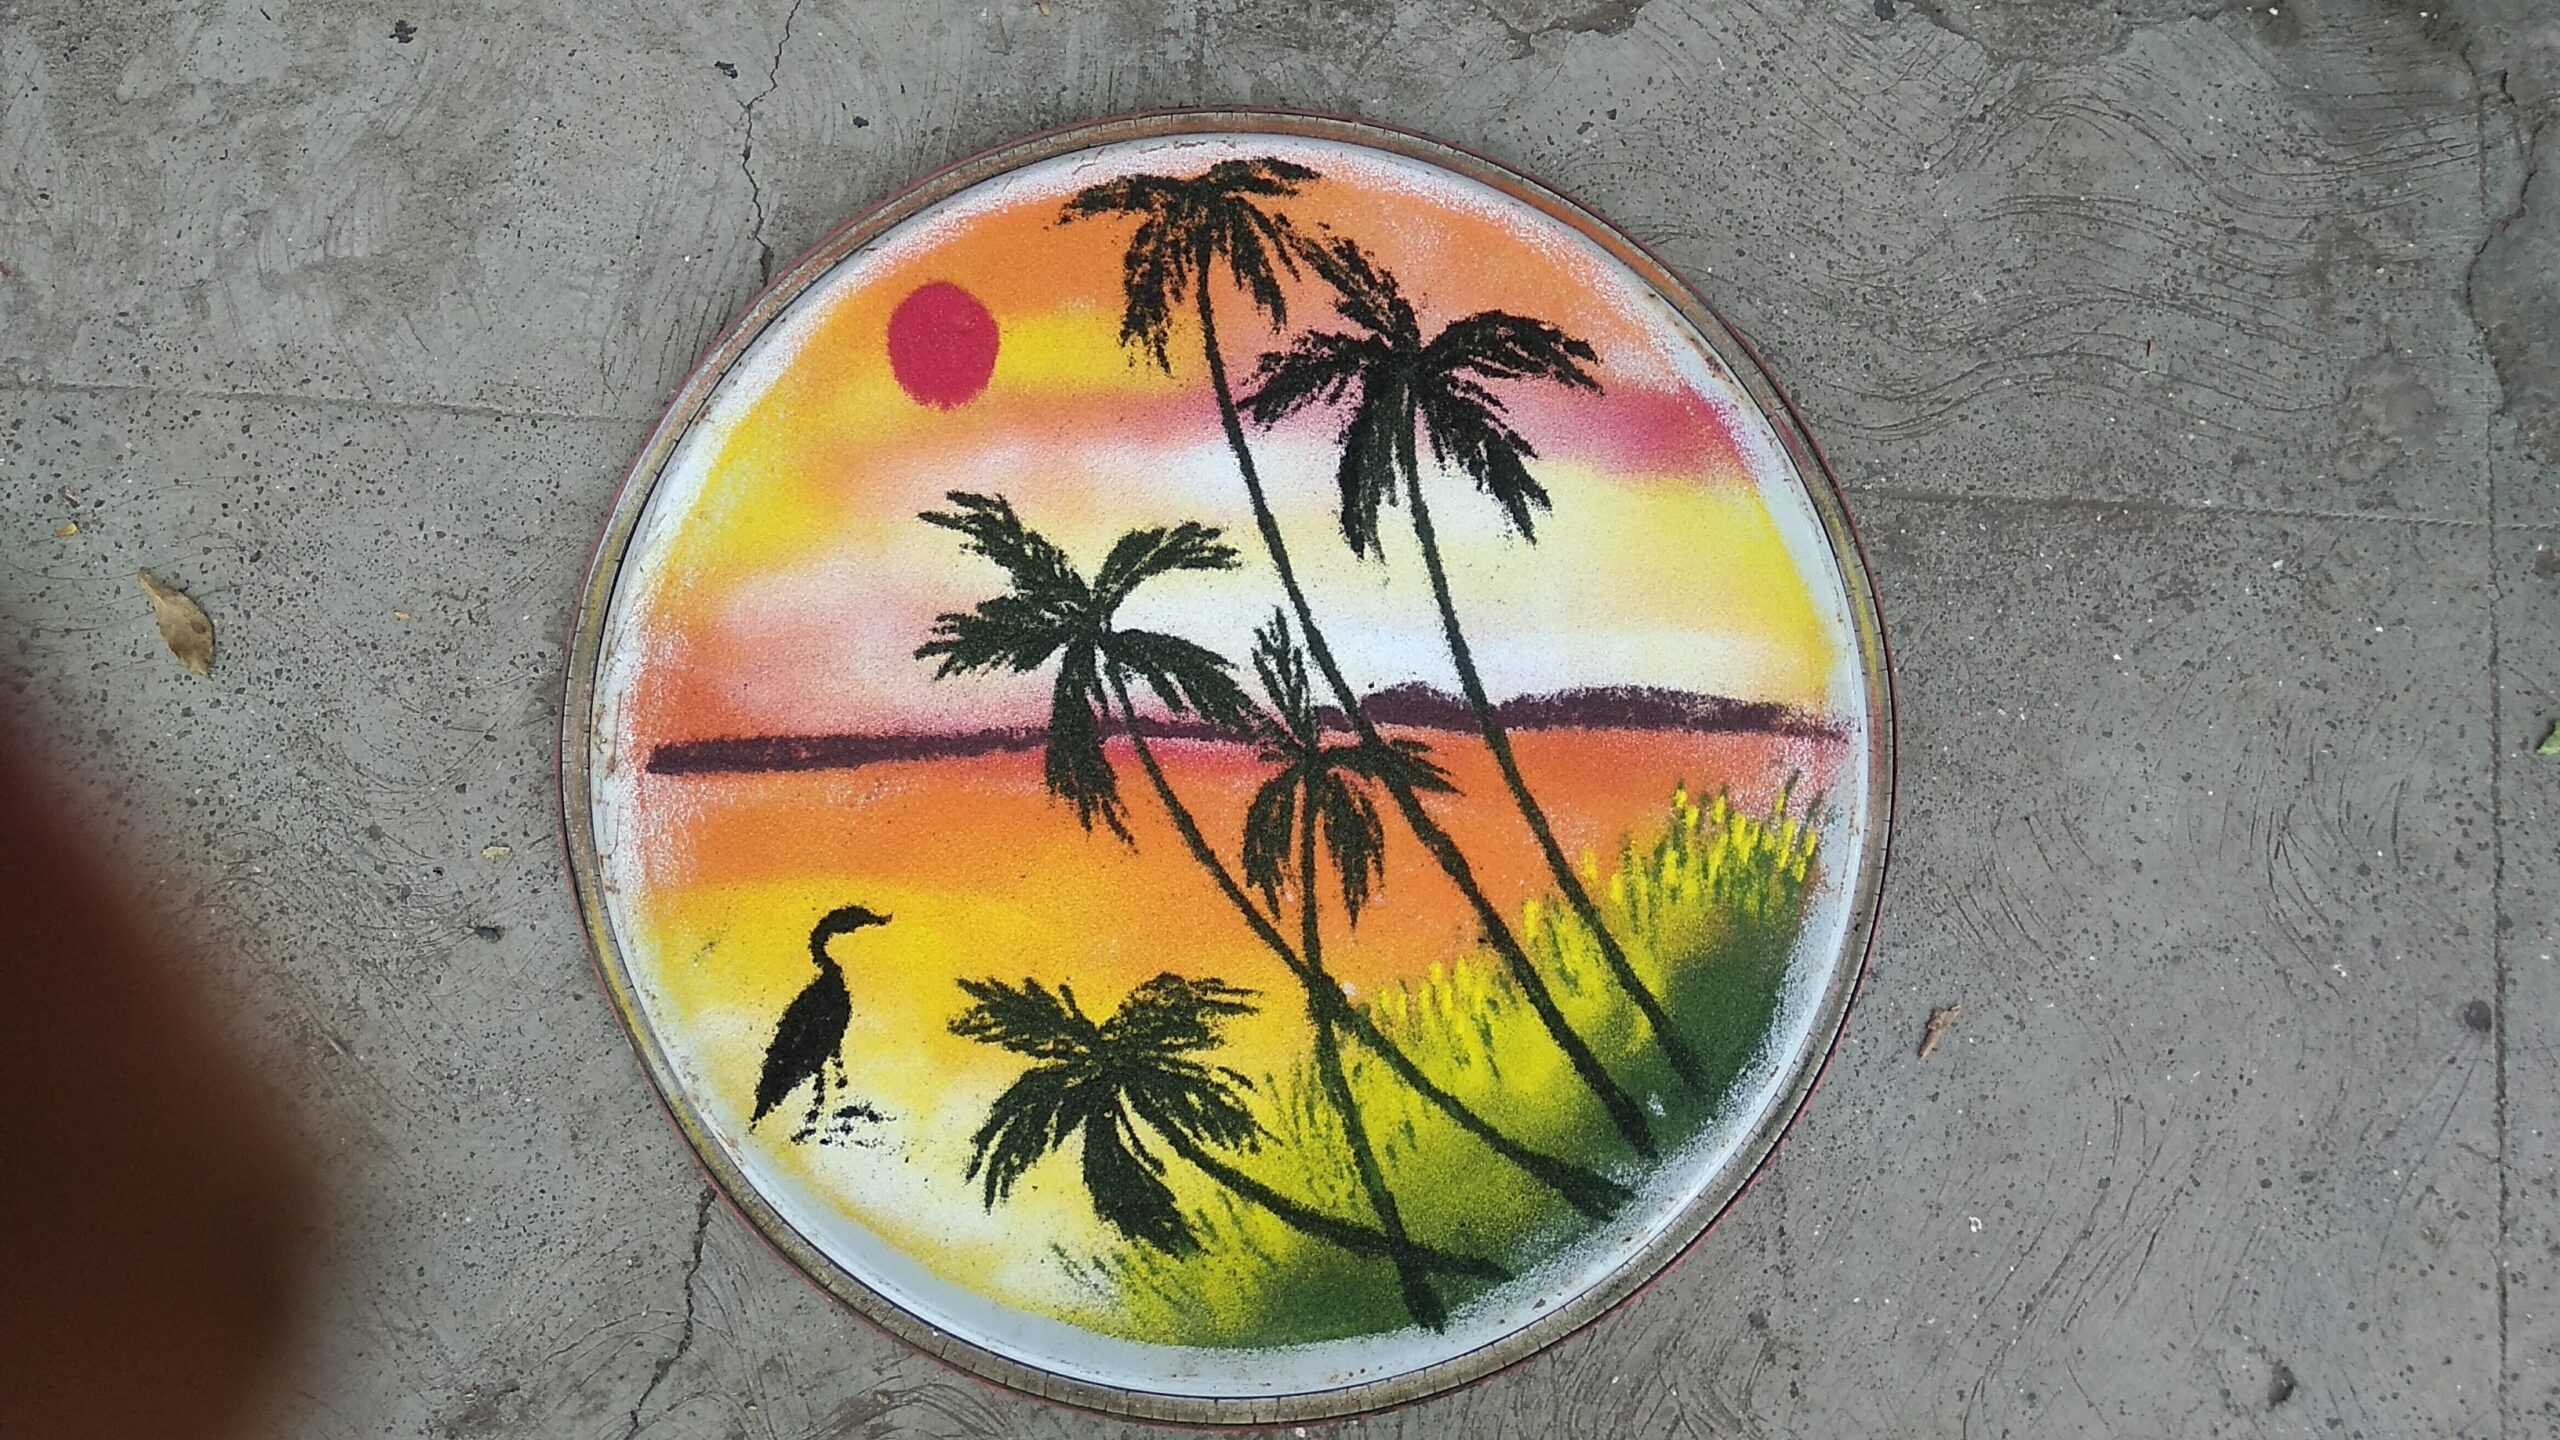
Scenery Rangoli step by step
Scenery rangoli is my favourite and it looks attractive. Here is a step by step [...]